Widget
Widget is a content element which can be dragged and dropped into webpage blocks.
To create a widget, you need to add Widget subdirectory to your plugin. There you have to create separate subdirectories for every widget. Widget subdirectory names should have no spaces or extended characters: it is recommended to use UpperCamelCase capitalization, e.g. MyWidget .
Minimal Widget
You can download the most basic "Hello world" widget example here. It contains just a single view file with some HTML code.
To create a widget from scratch, you need to make a new plugin. Then add a subdirectory for your widget (e.g. /MySamplePlugin/Widget/HelloWorld/). Add skin subdirectory, and create a file default.php containing HTML code to display. This is enough for widget to be used. Make sure you haven't forgotten to activate your plugin in admin panel.
Add widget management
Widget management should be implemented using JavaScript. On page load, ImpressPages executes IpWidget_MyWidget.init function. The purpose of this function is to initialize management tools of the widget. First argument passed to this function is jQuery object holding widget's DOM element. Second parameter is current widget's data from the database. If you have two widgets, this function will be executed twice on each of them.
There are no strict rules how to implement your widget's management. You can make editing inline as default text widget or open a popup like HTML widget.
It is also up to you to place "save" buttons or autosave the content. ImpressPages will store data to the database whenever you exectue $widgetObject.save method where $widgetObject is first argument of init method. First parameter of save method accepts the data to be stored to the database and next parameter instructs system if widget has to be reloaded. $widgetObject is DOM element of widget. is first parameter of init function
Widget's function should start with IpWidget_ keyword.
Sample widget's JavaScript file
/* Place the code below into MySamplePlugin/Widget/HelloWorld/assets/MyWidget.js file */
IpWidget_MyWidget = function() {

    this.$widgetObject = null;

    this.init = function($widgetObject, data) {
        $widgetObject.find('.myWidgetField').on('click', function() {
            var value = prompt('Enter the value');
            $widgetObject.save({myValue: value}, true);
        });

    };

    this.onAdd = function () {

    }

};
The data you save is automatically available in skin/default.php view file described above. Use that data to generate widget's look.
Widget assets
All the public files used in a widget, such as images, should be placed in assets subdirectory of the widget.
PHP side
In some cases you might need to controll widget's behaviour in PHP side. By default all widgets use \Ip\WidgetController class. You can extend this class and reimplement default functions in the way you need. To do so, create Controller.php file in your widget's root directory with following content. This simple example sets a widget title.
namespace Plugin\MySamplePlugin\Widget\MySampleWidget;

class Controller extends \Ip\WidgetController{
    public function getTitle() {
        return __('Sample widget', 'ipAdmin');
    }
}
Please have a look at Ip/WidgetController.php file for other functions that you can override.
Widget skins
A widget can have several different HTML skins, which basically are widget's view files placed in skin directory. This is a good way to provide several different looks of the same widget. The default skin file has a name default.php - this skin is mandatory for all widgets. But you can add any number of additional skin files. For sample code, see Divider widget, located in ImpressPages Ip/Internal/Content/Widget/Divider directory.
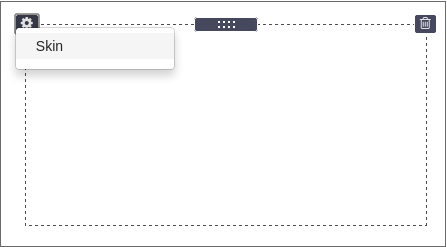
If widget has more than one skin, a gear icon will appear on the left corner with option to select the skin.
All data that you have saved using JavaScript is automatically available in a skin. If you have stored an object {testVariable: 'testValue'}, then <?php echo $testVariable ?> will be available in the skin.
You can add additional skin to chosen widget by adding a file to your theme Theme/xxx/override/Ip/Internal/Content/Widget/xxx/skin/xxx.php
In PHP controller you can modify data before it is passed to the skin. Extend generateHtml method to do so.
<?php

// Put this into Controller.php

namespace Plugin\MyPlugin\Widget\MyWidget;

class Controller extends \Ip\WidgetController
{
    public function generateHtml($revisionId, $widgetId, $data, $skin)
    {
        $data = array ('myVariable1' => 'My string.', 'myVariable2' => 'My other string.');

        return parent::generateHtml($revisionId, $widgetId, $data, $skin);
    }
}
<!-- Put this into skin/default.php -->
<h1><?php echo $myVariable1; ?></h1>
<div><?php echo $myVariable2; ?></div>
Changing widget's icon
To change a default widget icon, place a file called icon.svg or icon.png to your widget assets directory.
See also
Helper HTML snippets in admin mode
Widgets often need an additional HTML in management mode. Add subdirectory 'snippet' to your widget. Any view file placed in here will be automatically added to the end of HTML body. So you can use it straight away in widget's management JS.